Yes, it was on MY list of things to do, and it has been CROSSED OFF!... I am very excited that I have managed to complete at least two jobs that are visible on the boat!..(the first was antifouling).
We often work by the saying ".....If you are going to do something, take your time and do it right the first time...." and for these tramps they form an integral part of our working platform so it would be great to have them so they don't have to be re-done. Of course we are expecting to have to tighten them up if they stretch, but to have a system in place that we think will work is important.
Tramps on boats are one of the many challenging subjects that everyone has an opinion for. There are lots of ways of doing it, but finding the 'right way" that suits your own boat is often quite hard if you are trying to do it yourself. We have listened to advice, looked at examples, and have a little of our own experience with our own catamarans to look at pros and cons.
I felt that the Lashing of the Tramps deserved its own post, as it will cover a few different things. What we were looking at doing was trying to make it the easiest way for tightening, maintaining and replacing if we had to.
On our Great Barrier Express "Orient Express" (8.5m racing catamaran) we had a solid trampoline material with stitching around the perimeter. Although it looked fantastic, nice and tidy, we found the stitching would often break and doing so meant we had to take the entire tramp off to get it fixed (usually at a cost at the local sailmakers loft). This was very inconvenient, and often costly as it would often happen in the middle of race or a relaxing cruising trip! (There are more UV resistant threads on the market that will tolerate the UV light but once again comes at a cost. It is possibly something to consider if going for solid sewn tramps).

Orient Express: Note the perimeter strip with stitching and bolt rope against the hull, and solid tramp material.

Orient Express: Freya enjoying an afternoon beanbag snooze in a tranquil bay at Waiheke Island, Auckland
Recently we met up with our friend John Murphy (aka Bob) who owns a Malcolm Tenant 52ft High Octane catamaran called "^2" (The Power of 2). We spent lovely days on board cruising in the Bay of Islands with him and one thing we noted was how the tramps were tied, so after interrogation Bob revealed his sources.... "believe it or not, it's called Square Knotted Netting and it was cheap!"....
^2: Individual lashings evenly spaced
In a previous post on the Invisible Slugs I showed the side of the tramp that is fixed to the hull. This post is for the tapered side which is opposite the Invisible Slug side. This required a different tying system. We first tried a zig zag lashing that would essentially 'move' with the load being applied to the tramp. After walking on the tramp and giving it a stretch we found a typical fault that could cause problems later. The tramp 'moved' where the person was walking thus showing points of potential chaffing on the slugs. Even though Dynex has excellent strength, the chaffing is not good, so we decided to re-lash it again. We also found that we wanted to make the tramp tighter and to have less movement when load was on it. Typically this type of lashing would be quite hard to make tight without 'feeding' the line through and keeping load on it at all times - something that is quite hard to do on the water. Time to re-think the lashing design....

Pre-tension zig zag lashing to the front beam before the individual lashings were applied.
After a few design meetings with my other chief designer (Craig) we came up with a new lashing that would eliminate the need to keep a continuious load on while lashing, and also provide another safety feature - if one broke, the whole net wouldn't fall down. Something quite essential we thought, especially with adventurous kids aboard!
So our pre-tension lashing was the zig zag, then we stretched it again by walking (and lying) on it, then re-lashed to our new lashing style. It would take approx 100m of Dynex to lash the two tramplines - I never thought it would take that amount, but I am so glad Dynex is light!

Craig said he was "stretching the tramps"...

Individual Lashing: Identifying each 'loaded' line from the other end with
green tape made it easier for making sure I was loading the right line
The tapered side of the tramp was a bit tricky, but it became a mathematical problem more than anything. We had 106 squares from front to back, but the sides would taper in by 14.5 holes.. so we had to work out how we were going to lash the squares without having any bodgy bits (I hate bodgy bits), and making it even and tight. So a pattern was created that would be repeated down the side.


The same type of lashing was used for the back and the front so each length of Dynex was typically the same. I found my 'tool of the week' - vice grips.. They saved many blisters on my hands (even through sailing gloves), and I was able to get a great amount of purchase in using them!
We know they will stretch even more once used every day, but at least we can maintain them ourselves, and tweak and tighten when it suits us, day or night! I was quite proud of myself when Craig said to me.... "They are the tidiest tramps I've ever seen like this! Well done Babe I'm so proud of you, they look great".. So what more can I say! His attention to detail is amazing (finical in fact) so I was very happy that I passed this one with flying colours!
Bring on the painting!

The step pattern repeated down the tapered edge

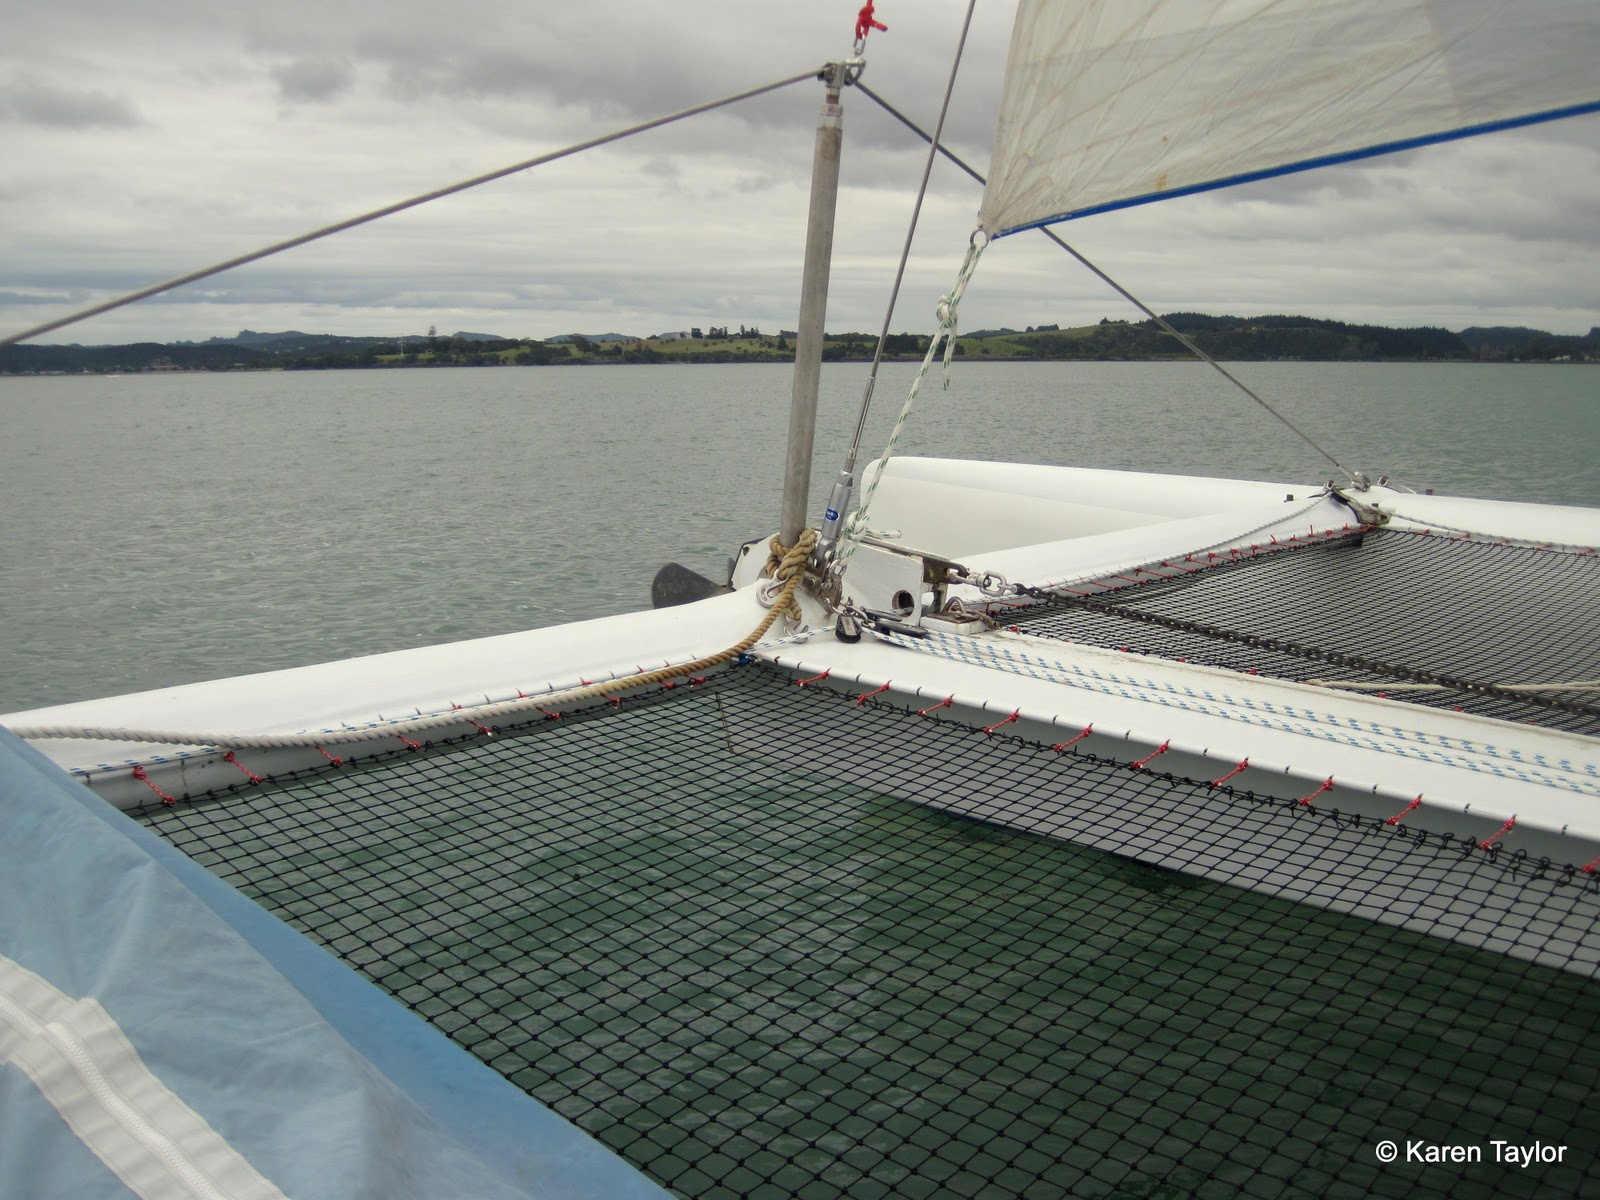
The finished product, lashed, and ready for use.
The same type of lashing was used for the back and the front so each length of Dynex was typically the same. I found my 'tool of the week' - vice grips.. They saved many blisters on my hands (even through sailing gloves), and I was able to get a great amount of purchase in using them!
We know they will stretch even more once used every day, but at least we can maintain them ourselves, and tweak and tighten when it suits us, day or night! I was quite proud of myself when Craig said to me.... "They are the tidiest tramps I've ever seen like this! Well done Babe I'm so proud of you, they look great".. So what more can I say! His attention to detail is amazing (finical in fact) so I was very happy that I passed this one with flying colours!
Bring on the painting!