"Good water, good life; poor water, poor life; no water, no life" Sir Peter Blake


Saturday, January 21, 2012

Prepping for Top Coat

If there was one thing to comprehend, it's the preparation that goes into a boat ready for painting. Of course there are some who just slap on a bit of paint after a bit of a scuff with an orbital, .....and then there is Craig.  He is a master of perfection, and when it comes to painting, it has to be "Just Right"... before any paint goes on. Although Mazuran will not be as 'fair' as we would like, she is getting much more attention on her topsides than we originally anticipated.

It makes sense to do the topcoat now, really... it's only the budget that has pushed it to a non-priority, but somehow, it's come back to be at the top of the list!   Many thanks to our dear friend Steve Salmond  of New Zealand Multihulls (http://www.newzealandmultihulls.com/frames.htm) who came to visit us and told us that we just HAD to paint the boat with topcoat! It was his enthusiasm that set us on the path of painting...So here we are, in the midst of being covered in sanding dust, and growing shoulder muscles that I never thought I had - all in pursuit of a shiny coat.

I honestly never knew there were so many 'layers' in sanding a boat.  It's not just about randomly going over it with a electrical sander and putting on some paint.. it is another language.  I hear things like "paddle board" (also known as the torture board -  I found out why after 20 minutes of using it!), "long boarding", "guidecoat", etc etc.  Yes it's certainly another language, and it's not just about sanding... there are types of paint "layers" that go with this mammoth amount of hard work.  Of course I was on the 'dainty' end of a compressor driven random orbital sander, to which I must say was fantastic to use! (It's my tool of the week).  Lightweight and easy to use.

So there we were, one side was myself using the sander, while on the other side was Craig using the "paddle board"... which apparently is for making the surface more even.  It was a romantic afternoon passing glimpses through white eyelashes & dust masks when we were changing our sandpaper.  It was good motivation though - both were working on our dream!


Consideration for masking is important and a 'good' amount of time should be allowed. Like anything marine, allow yourself at least three times longer to do it.  It's a task that you cannot do when you are tired, especially when masking 'lines' on the boat.  Remember to protect the surroundings that might end up with overspray if you are spraying.


Next is undercoat then the shiny stuff!

Monday, January 16, 2012

Packing Kites

Packing kites is certainly not just for the enjoyment of sailing them on boats!  The 'crew' certainly loved lending a hand.....all that is needed is a puff of breeze and a large piece of material and you can just about guarantee enjoyment and lots of giggles!  

Certainly lots of fun sorting out Mazuran's wardrobe.


Tuesday, November 08, 2011

Lashing Tapered Tramps

Finally the tramps are lashed! 

Yes, it was on MY list of things to do, and it has been CROSSED OFF!... I am very excited that I have managed to complete at least two jobs that are visible on the boat!..(the first was antifouling). 

We often work by the saying ".....If you are going to do something, take your time and do it right the first time...." and for these tramps they form an integral part of our working platform so it would be great to have them so they don't have to be re-done.  Of course we are expecting to have to tighten them up if they stretch, but to have a system in place that we think will work is important.

Tramps on boats are one of the many challenging subjects that everyone has an opinion for.   There are lots of ways of doing it, but finding the 'right way" that suits your own boat is often quite hard if you are trying to do it yourself. We have listened to advice, looked at examples, and have a little of our own experience with our own catamarans to look at pros and cons.

I felt that the Lashing of the Tramps deserved its own post, as it will cover a few different things. What we were looking at doing was trying to make it the easiest way for tightening, maintaining and replacing if we had to. 

On our Great Barrier Express "Orient Express" (8.5m racing catamaran) we had a solid trampoline material with stitching around the perimeter.  Although it looked fantastic, nice and tidy, we found the stitching would often break and doing so meant we had to take the entire tramp off to get it fixed (usually at a cost at the local sailmakers loft).  This was very inconvenient, and often costly as it would often happen in the middle of race or a relaxing cruising trip!  (There are more UV resistant threads on the market that will tolerate the UV light but once again comes at a cost. It is possibly something to consider if going for solid sewn tramps).

Orient Express: Note the perimeter strip with stitching and bolt rope against the hull, and solid tramp material.

Orient Express: Freya enjoying an afternoon beanbag snooze in a tranquil bay at Waiheke Island, Auckland

Recently we met up with our friend John Murphy (aka Bob) who owns a Malcolm Tenant 52ft High Octane catamaran called "^2" (The Power of 2).  We spent lovely days on board cruising in the Bay of Islands with him and one thing we noted was how the tramps were tied, so after interrogation Bob revealed his sources.... "believe it or not, it's called Square Knotted Netting and it was cheap!"....

^2:  Individual lashings evenly spaced

We found the company who sell the netting (http://www.taylorbuilt.co.nz/home/home.htm) who actually specialise in greenhouses.  This particular netting comes in either a 5m or 10m lineal metre rolls, so we could cut it to whatever length we wanted.  We used the 10m roll as it worked well with our sizes and any offcuts could be utilised to make safety rails along the staunchions and netting bags inside the boat that are often used for clothing, general gear and sometimes fruit and vegetables. NOTE: If you are going to get some of this netting it does however have some 'joining' so look closely before you cut your perfect square - we located where joins were in the stitching with green masking tape so to avoid them for our "tramp area".  It worked well that we had 'bits left over' so we could adjust our 'squares' to avoid these bits.

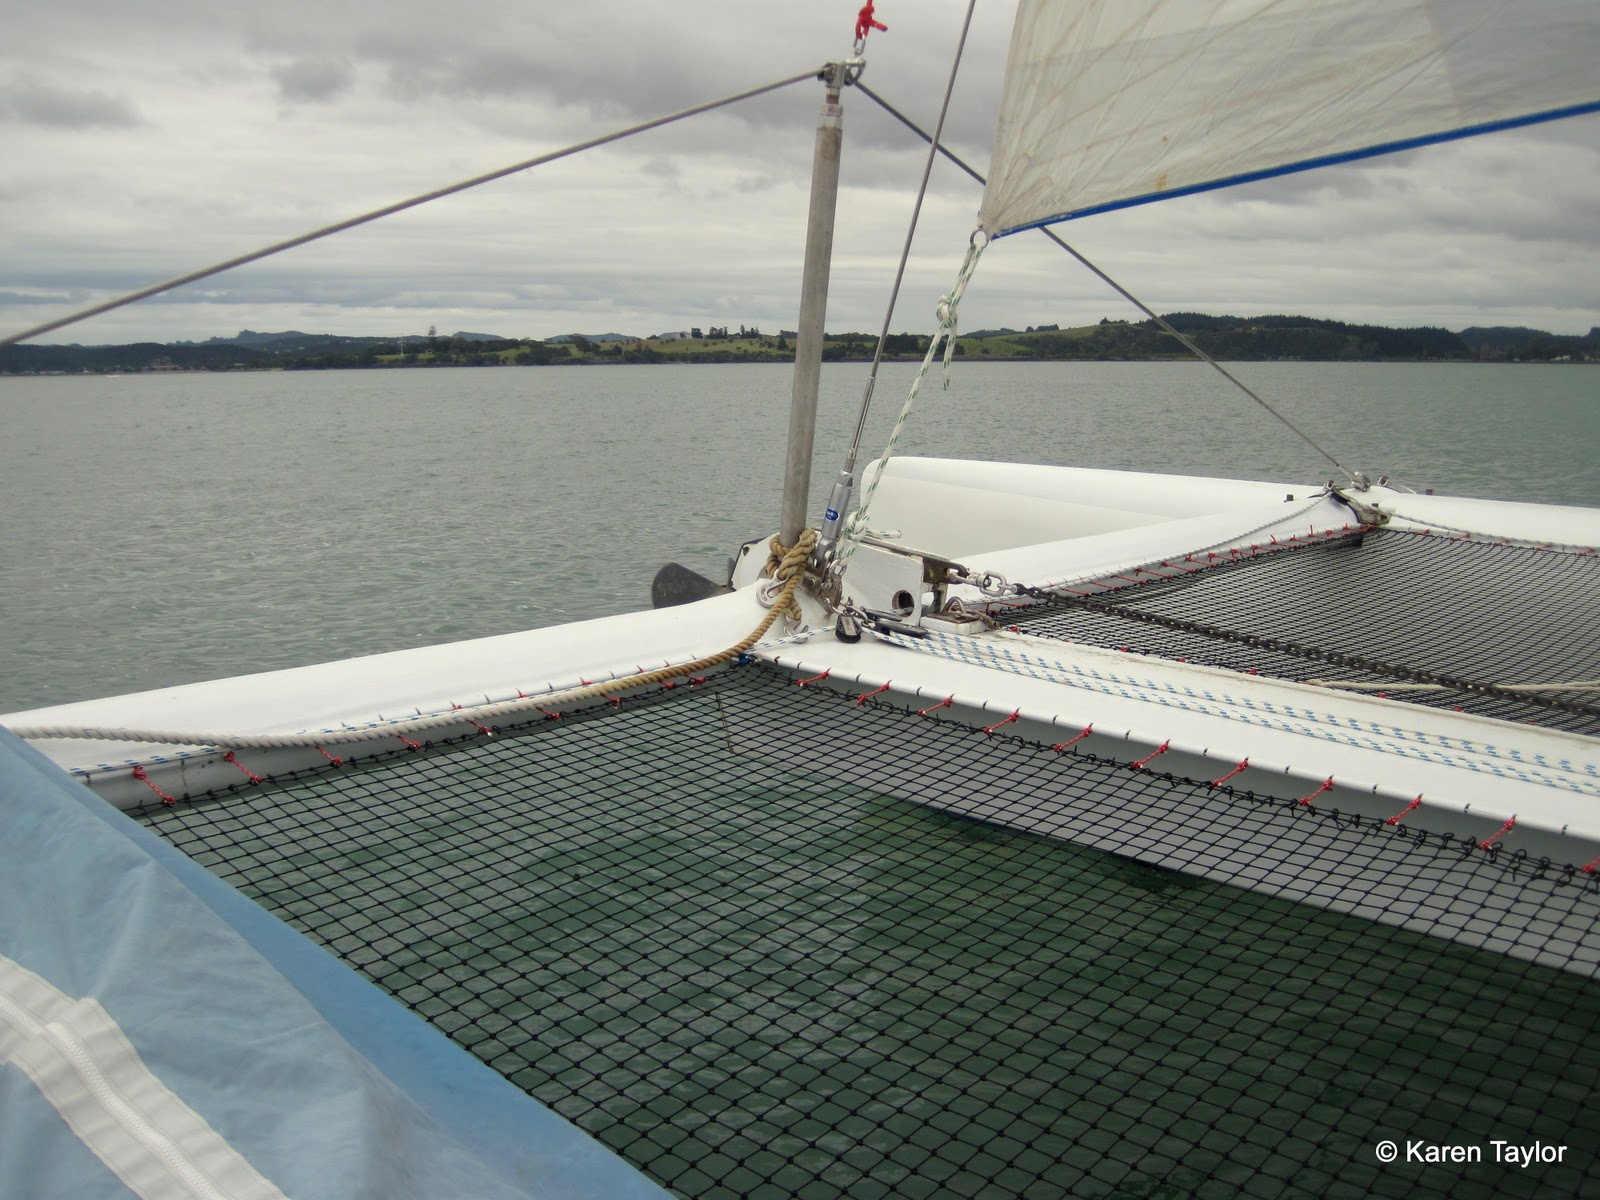
In a  previous post on the Invisible Slugs I showed the side of the tramp that is fixed to the hull.  This post is for the tapered side which is opposite the Invisible Slug side.  This required a different tying system.  We first tried a zig zag lashing that would essentially 'move' with the load being applied to the tramp.  After walking on the tramp and giving it a stretch we found a typical fault that could cause problems later.   The tramp 'moved' where the person was walking thus showing points of potential chaffing on the slugs. Even though Dynex has excellent strength,  the chaffing is not good, so we decided to re-lash it again.   We also found that we wanted to make the tramp tighter and to have less movement when load was on it.  Typically this type of lashing would be quite hard to make tight without 'feeding' the line through and keeping load on it at all times - something that is quite hard to do on the water. Time to re-think the lashing design....

Pre-tension zig zag lashing to the front beam before the individual lashings were applied.

After a few design meetings with my other chief designer (Craig) we came up with a new lashing that would eliminate the need to keep a continuious load on while lashing, and also provide another safety feature - if one broke, the whole net wouldn't fall down.  Something quite essential we thought, especially with adventurous kids aboard!

So our pre-tension lashing was the zig zag, then we stretched it again by walking (and lying) on it, then re-lashed to our new lashing style.  It would take approx 100m of Dynex to lash the two tramplines - I never thought it would take that amount, but I am so glad Dynex is light!

Craig said he was "stretching the tramps"...

  Individual Lashing:  Identifying each 'loaded' line from the other end with
green tape made it easier for making sure I was loading the right line

The tapered side of the tramp was a bit tricky, but it became a mathematical problem more than anything.  We had 106 squares from front to back, but the sides would taper in by 14.5 holes.. so we had to work out how we were going to lash the squares without having any bodgy bits (I hate bodgy bits), and making it even and tight. So a pattern was created that would be repeated down the side.

The step pattern repeated down the tapered edge


The finished product, lashed, and ready for use.

The same type of lashing was used for the back and the front so each length of Dynex was typically the same.  I found my 'tool of the week' - vice grips.. They saved many blisters on my hands (even through sailing gloves), and I was able to get a great amount of purchase in using them!


We know they will stretch even more once used every day, but at least we can maintain them ourselves, and tweak and tighten when it suits us, day or night!  I was quite proud of myself when Craig said to me.... "They are the tidiest tramps I've ever seen like this! Well done Babe I'm so proud of you, they look great".. So what more can I say!  His attention to detail is amazing (finical in fact) so I was very happy that I passed this one with flying colours!

Bring on the painting!

Monday, October 10, 2011

One fish, Two fish....

WOW! ....We are so impressed with the kids progress in their water skills.  They both received their certificates for their awesome progress. (Very proud parents).

Freya is definately turning into a mermaid - absolutely loves getting the rings off the bottom of the pool and "teaching herself".. by this I mean she watches others swimming, then tries it herself!.. I'm sure she is growing gills as she spends most of her time underwater!  Very cool!  She loved using flippers - just need to get her a mask and snorkel and for her to recognise what a scallop looks like underwater in the sand!

Blake is constantly moving and loves swimming out to us in the pool, then diving down to get the rings, but his favourite is definately walking/running underwater and doing widths of the pool, fast!

Once again we thank the awesome people who are supporting us! 


The Invisible Tramp Slug

"Slug" .. That is such a perculiar word!  (To me, anyway!)

In researching the word 'slug' I have found SO many different definitions!  They ranged from small bullets to terrestrial gastropods (garden slugs) to a shot of liquor!  Excellent!  Nope this "slug" is none of those really, although the last one sounds good!  (Although after a wee while there might be a slimy mold - but nothing a bit of routine maintenance cannot fix!) 

The slugs I'm talking about here are tramp slugs. 

Fixing tramps always strike conversations with multihull owners - they are often trying to solve many a problem when it comes to lashing tramps.  In many hours of researching we decided to come up with our own trial for the new tramp track that we replaced on the side of Mazuran's hulls.  We wanted something that was tidy and most importantly easy to maintain by ourselves.  Although a bit fiddly to knot or two were needed, we think it is a good solution and named it the "Invisible Slug" because of the way it disappears into the slot.  I suppose "hidden" might have been a better word to use, but "invisible" sounds more mysterious!   


Note: Those with limited amount of patience should not try this!

So to those who were wondering about slugs in high heels and red lipstick, or the garden sort, this will hopefully satisfy your curiosity!


Isn't it so sleek and tidy! Pretty flash if you ask me.

We currently have alloy beams across the front and in the centre, so 'standard' slugs are being used for lashing (as you can see in this picture above), but plans for composite beams and more invisible slugs are on the plans for the future!

The tramps are tapered so they are proving to be quite challenging for the lashing, but I will cover that in a later post.  All good fun though!

Nothing like a good challenge.


Thursday, September 22, 2011

Back Floating Dolphins

Freya and Blake have been loving the swimming! 

Freya has mastered the "back float" by herself!  We are all very excited.  It won't be long before Blake is joining the back float club.  The teachers at the pool are very impressed with the kids progress, as are we!  Lovely warm water, and great relaxed atmosphere and wonderful people who are supporting us! 

Summer is only a little way away, we can almost smell it!  Looking foward to the warm weather, and to be in the water!


Monday, September 05, 2011

Two Halves Make a Whole

Hooray! It's very exciting to see the foils being made!  

First centreboard is completed out of the mould and the second has been started.  This means we will be able to sail to windward without going sideways - that's always a bonus for a yacht. 


Boards are are 4 metres long x 600mm wide, so there is a bit of beef to them.  Haven't weighed them yet, but expect them to be around 55-60kg each.  Anybody who has built these before definately will know how much work goes into them.  They are a combination of foam, carbon fibre, fibreglass, cedar and 246 TG resin and several buckets of elbow grease.  Next we need to attach lifting ropes and somehow put them down the centrecases without hiring a crane! 

I admire Craig's enthusiasm and excitement in making both the rudders and centreboards - he has a passion for foils which makes him so determined to make them work.  This is like the "reward" for all his long months sanding and grinding the not-so-enjoyable jobs.